Set instances and instance parameters
1 General
There are two modes: edit and run mode.
It is possible to do different parameter configurations and even assign variables in those two modes.
All configurations from edit mode are taken over into run mode when first entering run mode.
This is not the case anymore, when changing between edit and run mode for the second time and onwards. Changed parameter configurations are giving the user the impression that they have not been implemented.
You can distinguish between edit and run mode on the worksheet, because there is a grid in edit mode. In run mode the worksheet has no grid.
Instance parameters are set in run mode or in Online Observation mode. They are specified in the parameter dialogs of the function blocks. It can be looked up in the belonging description whether the function block has a parameter dialog.
More commands for the parameter list are contained in the Run submenu. The parameters of the project can be exported and edited in another tool and thereafter re-imported.
Image: Programming system is in edit mode, which you can recognize by the grid on the worksheet.
2 Adjusting parameters and variables
There are several possibilities to adjust the parameters and variables of both modes.
The easiest way not to allow different configurations is to switch off the ability to instanciate variables and assign global parameters instead of simple parameters. The problem is, that new users are often uncertain how to deal with instanciation of parameters that is why the above described way should be applied.
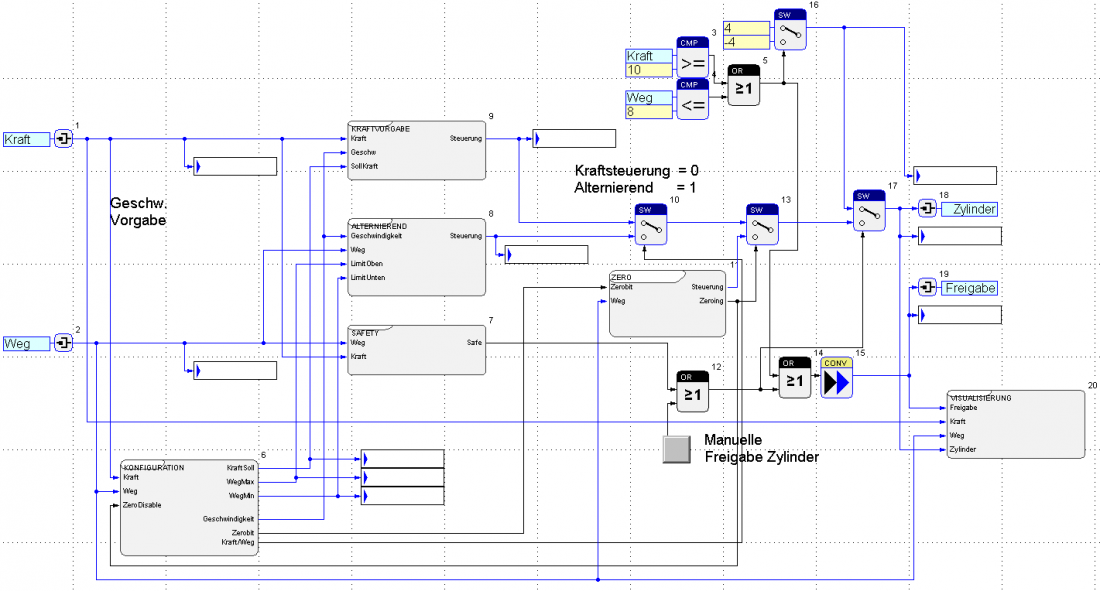
Parameters with instance settings can be recognized by looking at the parameter box, it has a white background. Special care has to be taken with those parameters, as they can deviate from each other. A parameter, which has a yellow background is a global parameter, which is the same in all modes and thus overwrites the parameter when downloading on the controller.
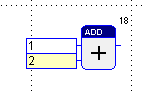
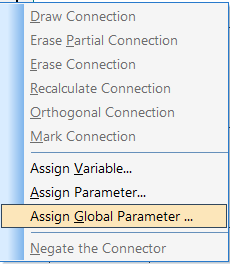
Image: The parameter above has a white background and can include another value in run mode than in edit mode. The parameter below has a yellow background and is a global parameter, which has the same value in all instances.
It is similar with variables. Global and instanciable variables are also distinguishable by the color of their background.
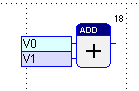


Image: The variable with the light blue background is the instanciable option, while the darker background cannot be instanciated.
This selection counts for the particular connection and not for the variable itself. It is possible to assign one variable multiple times and to activate or deactivate single instance settings.
3 Changing between the different modes
To change from run mode into edit mode, you can either right-click on a macro or program in the project tree and select the option “edit”, or you click on “edit” in the taskbar -> configuration, program block, or macro block.
Alternatively, you can also use F5-F7 to start editing the configuration, the program or a macro.
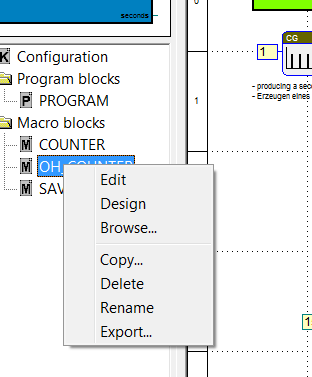
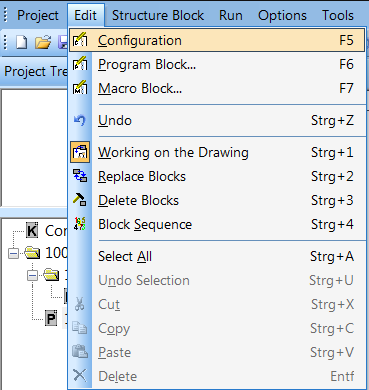
Images: Possibilities to change from run mode into edit mode.
Run mode can be started via menu item Run -> Enter, or shortcut F8, or via the run symbol in the toolbar.
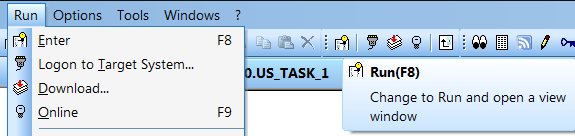
Images: Possibilities to change from edit mode into run mode.
Tips
Macro blocks
If a part of an application takes much space on the worksheet, you can “cut” that unclear part out and paste it in a macro block. That way the partial application can be replaced by one single block. This block can be configured in its size and design.
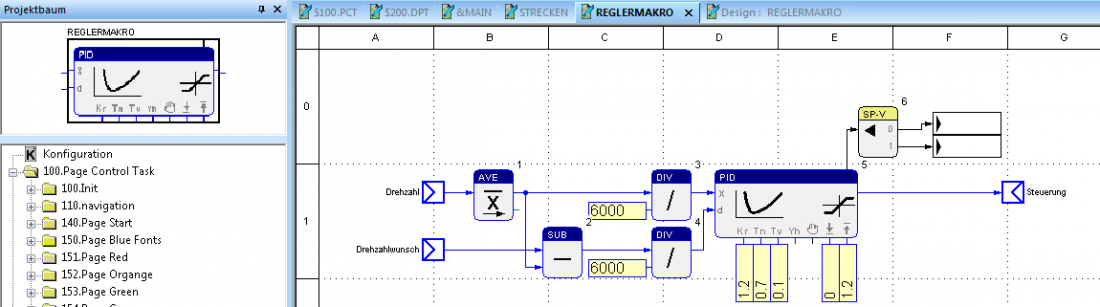
Image: The shown macro block contains the parameterization of the controller and the correct wiring with the setpoint and actual value at the inputs. Furthermore it reduces the needed space on the worksheet. To understand the block more easily, the symbol of the controller is on the macro bloc.
Text comments
To be able to understand which program part is responsible for what later on, it is recommendable to define each program part and arrange them carefully. It really helps to mark each program part with a significant text comment.
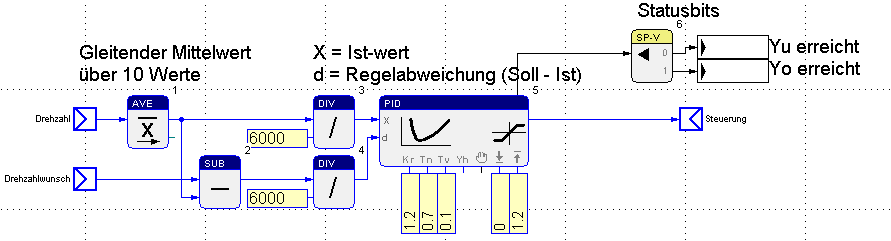
Image: Clear comments help to quickly understand the functions of the blocks.