Menu
1 General

Menus consist of several submenus. The submenus contain the commands required for creating projects and handling the system. If commands that are not available in a current system state, they are deactivated.
| Submenu | Content |
| Project | - Load, save and print projects - Work with libraries |
| Edit | - Select the project level for editing - Undo last Edit operation - Set the Edit mode - Work with the clipboard |
| Structure block | - Define the display of structure blocks - Copy, delete and rename structure blocks - Define access rights for structure blocks - Import and export structure blocks and instance parameters |
| Run | - Switch to Run mode - Establish the connection with simulation or target system - Create the target code and download - Switch to Online Observation - Work with parameter values of the project |
| Options | - Activate and deactivate elements of the user interface - Define the display of the worksheets - Set system parameters |
| Tools | - Additional tools |
| Windows | - Activate, arrange and close worksheet windows - Export window contents as bitmaps into the clipboard |
| ? | - Access online help - Display program version and contact address |
2 Project submenu
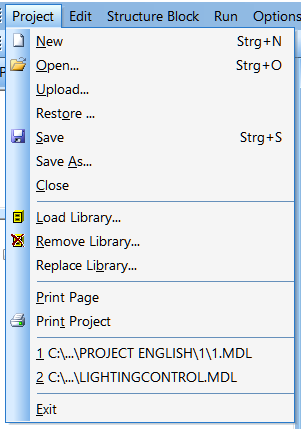
New ![]()
This command is used to create a new project. New projects are created based on templates. Usually, such templates have been prepared for specific devices or applications. Select a template from the list displayed in the opened dialog and enter the name of the new project. The project is usually created in a subdirectory of the same name in the project directory, and comprises several files. After the project has been created, it is automatically opened and can be edited.
Open... ![]()
When this command is used, a standard file selection dialog appears from which a project file can be opened. After selection of the file, the project is loaded and can be edited.
Upload...
Using this command a program can be uploaded from a target system. With this function a back annotation of currently running projects can be done. This is possible because rebuilding information are stored in the target system every time a project is downloaded. This data allow access to the current state of the project running at the target device.
The configuration and target system respectively must support this feature, so it is not always available.
Restore...
When this command is used older versions of the project can be restored. A selection of available restore files will be shown in the file dialog.
The current work state and selected settings are saved in the files of the project.
Save As…
The new name of the project file and the target directory can be entered in a standard file dialog. Upon confirming the input, the project file, the parameter list and the file containing the working area settings are saved under the new name. Any subsequent operation is carried out with reference to the newly created files.
Close
The current project is closed.
Load Library… ![]()
A dialog is provided to insert additional libraries in the project. The dialog offers all available libraries of the configured directories for selection. By selecting a specific directory or using the buttons beside them, the list can be adjusted. After loading the libraries and closing the dialog, the containing function contained can be used for the project.
Remove Library… ![]()
This command is used to remove any library from the project which is no longer used and/or obsolete. The dialog displays the libraries currently loaded, the containing blocks as well as dependencies between libraries. Libraries, which are used by others, cannot be deleted. If the project contains blocks of a library to be deleted, a warning is displayed. A special switch in the main configuration file needs to be activated to delete system libraries.
Replace Library…
This command is required when changing the version of libraries. Obsolete libraries are replaced by newer ones. In this process the blocks included in the project are automatically exchanged. This exchange can be traced and assessed in the trace output of the messages window. In particular, the trace output indicates problems (if any) occurring when parameters are copied as well as version conflicts. If libraries are used by other loaded libraries, an exchange is not possible. First, the dependency between libraries needs to be removed. A warning is displayed, if libraries are to be replaced that have been loaded already. However, exchanging them would be possible. After all blocks of the obsolete library have been replaced, they are removed from the project. Following successful replacement, it is recommended to remove libraries from the project that have been used by the old library and are no longer needed.
Print Page
The active worksheet is printed. The worksheet format (refer to Options Submenu) influences its presentation.
Print Project ![]()
The entire project is printed, i.e. one page is printed for each worksheet. As displayed in the Run mode, the printout contains all structure block instances inserted directly or indirectly in the configuration level. The presentation when printed is defined by the worksheet format.
Exit
The programming system is closed. Before closing, the online connection (if activated) with the target system will be disconnected, the project will be closed and all components of the system are cancelled.
1...5
At the bottom of the submenu a sorted list is displayed, containing up to 5 of the last loaded project files. If a file is selected from this list, it opens immediately. If the project cannot be loaded, the entry is removed from the list.
3 Edit submenu
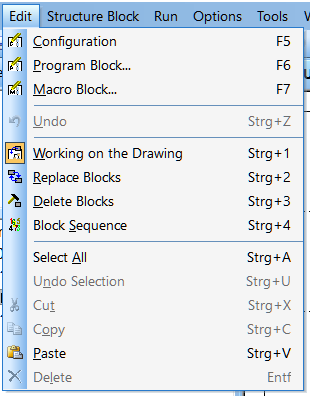
Configuration ![]()
This command opens or activates the worksheet window with the configuration for editing.
Program Block… ![]()
In the open dialog a program block can be selected for editing. If entering a name not included in the list, a new program block is created and an empty worksheet window is opened.
Macro Block… ![]()
Upon selecting a macro block from the dialog, the related worksheet opens for editing. If entering a name not included in the list, a new macro is created and an empty worksheet is opened.
Undo ![]()
While editing a project the inverse functions of the executed actions are automatically recorded by the programming system. They are needed to reset the project into the status before the last edit operation when calling undo.
Currently the inverse functions of the last 100 operations are saved. If more actions are executed after reaching this limit, the inverse functions of the oldest editing operation are deleted and the new ones added. The information for undo isn't saved with the project. Therefore it is lost after closing. Furthermore library operations (load, remove and replace) can't be canceled with undo.
Working on the Drawing ![]()
The edit mode of the same name is activated. In this mode it is possible to insert blocks, draw and delete connections, and carry out group operations.
Replace Blocks ![]()
The edit mode of the same name is activated. In this mode it is possible to replace single blocks.
Delete Blocks ![]()
The edit mode of the same name is activated. In this mode it is possible to delete single blocks by clicking with the mouse.
Block Sequence ![]()
The edit mode of the same name is activated. In this mode it is easily possible to specify the working sequence and the priority of blocks in the worksheet by clicking with the mouse.
Select All
All blocks in the active worksheet window are selected.
Deselect
The selection of blocks in the active worksheet window is made undone.
Cut ![]()
Selected blocks, their parameters and connections among each other are copied into the clipboard. Thereafter, the blocks and all related connections are deleted. In addition, a bitmap containing a display of the cut blocks and their connections is created in the clipboard, which can be further edited in graphic programs.
Copy ![]()
Selected blocks, their parameters and connections among each other are copied into the clipboard. In addition, a bitmap containing a display of the cut blocks and their connections is created in the clipboard, which can be further edited in graphic programs.
Insert ![]()
The objects from the clipboard are inserted into the project. If these objects are copied blocks with their connections, the blocks are inserted in the current worksheet and the connections are rerouted. Insertion requires the libraries necessary for the project to be loaded and/or used structure blocks to be defined. In addition, test.con permits the insertion of text via the clipboard. To this end, a text block is automatically generated. However, the length of texts is limited to 255 characters.
Delete ![]()
Selected blocks and their connections are deleted.
4 Structure block submenu

Design... ![]()
A dialog opens to select a structure block for the design. Upon confirming the selection, a design window with the symbol of the structure block opens and an additional toolbar is activated. The size of the symbol and the position of inputs and outputs can be specified. The additional bar contains buttons to change the appearance of the symbol, define the display in the worksheet window of the structure block and the access to it in the Run mode. The latter function can only be used if the access control has been activated.
Copy…
A dialog opens to copy program and macro blocks after a new name has been entered and the type has been selected. By copying a new structure block is created having the same design and content as the copied one.
Delete…
A dialog opens to delete program and macro blocks. When carrying out deletion, the definitions of the structure blocks and all calls are removed from the project.
Rename…
A dialog opens where the names of program and macro blocks can be changed.
Free Access
If the access control is activated, this command serves to remove any restriction on access rights to structure blocks in the Run mode.
Import…
Exported structure blocks can be inserted in the project with this command. The export file is selected in the called dialog. During the import the instructions saved in the file are executed to create the structure blocks. Messages and dialogs, which may appear, point to problems or ask to rename already used designations or to load needed libraries.
Export…
Single structure blocks or hierarchies can be exported with the called dialog into a file. Instructions for creating and parameterizing the structure block and the containing functions blocks are written to this text file. During the import they are automatically executed to restore the structures.
The export contains only the definition of the structure block. Parameter sets for different instances should be saved and restored with the following commands.
Load Connector Parameter…
Using this command, saved block parameters of a structure block instance can be loaded in the Run or Edit mode. With help of a file dialog the file can be opened. However, the precondition for successful restoring of block parameters is that the structure block definition has not been changed.
Save Connector Parameter…
This command is used for saving the block parameters of a structure block instance in the Run or Edit mode. A file dialog opens where a file name can be entered.
5 Run submenu
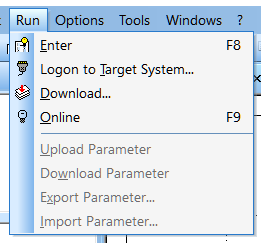
Enter ![]()
This command is used to change to the run mode. It opens a worksheet window for the configuration level. If the system is already in run mode, only a new window opens.
Offline Programming
If the relevant configuration switch in the main configuration file has been set, this command can be used to generate a download file without any connection to the target system. A dialog opens to enter the required device description file and the download file. After confirmation of the input, the translation is started and the file is created.
Logon to Target System… ![]()
This command serves to establish an online connection with the target system or start simulation. A dialog opens, containing a list of possible connections. If a connection is activated by double clicking, information about the target system is displayed. Commands can be sent to the target system by pressing the relevant buttons. In addition, connections may be closed, added, altered or deleted. If a connection has been successfully established, the commands listed below can be used in order to load programs and start online observation.
Download…
This command creates a download file from the project data and transfers it to the target system or simulation. If a connection has not yet been established, the Logon to Target System command is called before. Upon successful loading, online observation starts automatically.
Online/Offline ![]()
The Online command starts online observation without performing any download beforehand. However, this operation requires a connection with the target system or simulation to be established before. Furthermore, the program in the target system should correspond with the current project to the largest extent possible. Changed parameter values do not cause problems and can be adjusted by using the commands below.
In the Online Observation state the Offline command is available instead of the Online command. It is used to return to the Run mode.
Read Parameter from Target System
This command is available in the Online Observation state and serves to read out the values of all parameters of a project from the target system. After completion of reading, all blocks in the project are assigned the same parameters as the blocks in the target system.
Write Parameter to Target System
In the Online Observation state this command can be used to copy all parameters of a project to the target system. After the completion of this command, the blocks in the target system and the blocks in the project use identical parameters.
Save Parameter to Disk…
In the Run mode this command can be used to export all parameter values of the project into one file. A dialog is opened where the parameter file to be created can be indicated.
Load Parameter from Disk…
All parameter values of the project are imported from the selected file. The file contains only logic addresses and parameter values. Hence, allocation errors might occur after changing a project and subsequently importing old parameter files. Such problems occur, for instance, if a block sequence has been changed and the internal reorganization has been activated, or blocks have been deleted and others have been inserted thereafter.
6 Submenu options
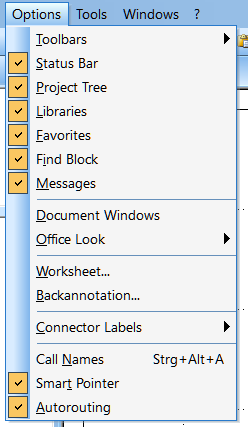
Toolbar
This command serves to activate or deactivate the toolbar. The toolbar is dynamically adjusted to the current state of test.con and facilitates quick calling of frequently used commands by clicking with the mouse.
Status Line
This command activates or deactivates the status line. The status line indicates the current state of test.con. In addition, it contains a brief description of menu or toolbar commands and tips.
Project Tree
Depending on the button's state, the project tree containing the structure of a project is displayed or hidden. The project tree is needed for inserting or replacing structure blocks.
Library Tree
This command displays or hides the tree with the loaded libraries. The views of the library tree are used to manage the loaded libraries and insert or replace function blocks in the worksheets.
Message Window
This selection is used to show or hide the message window.
Worksheet…
A dialog opens where the worksheet format, zoom factor and refresh rate can be specified.
The form and size of the worksheet window are in particular of relevance to printing operations. Only those areas are printed which are located inside the frame. Worksheets are reduced in size such that they can be printed on the sheet size set in the printer dialog.
The zoom setting specifies the size for displaying blocks in the windows. Zoom values between 0.3 and 10.0 can be selected.
In the Online Observation state signals are cyclically polled and displayed. The refresh rate controller serves to specify the repeat rate for refreshing. A value between 50ms and 5s can be specified.
The options for the crossing of text blocks and connector attributes refer to the autorouting. The state of the belonging buttons permits or prohibits that connecting lines are drawn such that they cross existing text blocks or parameters and variables appended to function block connectors.
Backannotation
A password can be entered to protect the restore information of the project downloaded into a target system. The password is used to encrypt the restore information during the download. After that the project can be uploaded and restored only with the correct password.
Connector Labels
This command is used to activate or deactivate the display of connector designations.
If activated, the related names are displayed beside inputs and outputs of the blocks. This function facilitates easy differentiation between connectors. Labels which are represented within structure blocks are still displayed, even if this option is deactivated.
It is possible to enable a transparent display. In this case the working sheet background is shown behind the name. Additionally a tooltip can be displayed.
Call Names
This selection serves to activate or deactivate the display of the function block call names. A call name is the internal ID of a function block used by the system.
Smart Pointer
If this item is activated, the cursor shape is indicative of current functions available in the Edit state. If this option is deactivated, the cursor is always displayed as an arrow.
Autorouting
This option serves to activate or deactivate the support for drawing connecting lines. If auto routing has been activated, the starting and target points selected are automatically connected such that the number of lines crossed is kept at a minimum and crossing of blocks is prevented. Line paths are optimized for drawing operations in order to comply with the above criteria.
The Worksheet Settings dialog serves to specify whether or not lines are allowed to cross text blocks which have already been inserted.
When the project is saved, all settings are stored in the respective file in the project directory and recovered when loaded again.
In addition, the options of test.con are stored in a main configuration file and are made available again when the program is restarted.
7 Tools submenu
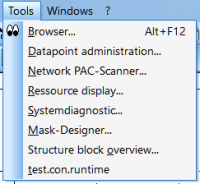
The Tools submenu contains additional tools.
You can find the help for datapoint administration, system diagnostics and the mask designer under Support → Tools
These tools can be independent applications or provide enhanced functions to support the work with test.con. Normally these tools provide their own help information.
8 Windows submenu
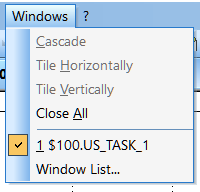
Cascade
All worksheet windows are displayed in an overlapping arrangement. The title bars of all windows are visible.
Tile
All worksheet windows are displayed in horizontal arrangement or, if there are 4 and more windows, in horizontal and vertical arrangement.
Symbols
If several worksheet windows were reduced to symbol size by using the Minimize button, the symbols are newly arranged when this command is called.
Close
The current worksheet window is closed.
Close All
All open worksheet windows are closed.
Note: This command closes all open windows, but not the project.
1, 2, ..., 20
If a worksheet window is covered by others, it can be easily activated and moved to the foreground.
Export to Clipboard
This command is used to copy the visible part of the current worksheet window into the clipboard. Another way of transporting window areas as bitmaps into the clipboard is provided by the Cut and Copy commands in the Edit submenu.
9 ? submenu

Index
The Help index is called.
Shortcuts
A survey over keyboard shortcuts and linked commands is started.
Commands
A survey over all menu commands is displayed.
Using Help
The operating system's help is called for explaining the help system.
About…
This command opens a window with information about copyrights and the version of test.con and provides a contact address for queries.