Blocks
1 General
The technical term of blocks refers to both structure and function blocks. Structure blocks are used for hierarchic structuring, whereas function blocks serve parameterizing, calling target functions, or visualization in the Online Observation state. Blocks are defined in the project or in loaded libraries.
The work with blocks is executed mainly with the mouse. The project and library trees are required to insert and replace blocks.
2 Insert blocks
Procedure
1. Select the block in the project or library tree
Blocks defined in the project are inserted via the project tree; all other blocks are inserted via the library tree. To insert blocks, the system must be in the Working on the Drawing, Delete Blocks or Block Sequence mode. After a block has been inserted, the system automatically changes to the Working on the Drawing mode.
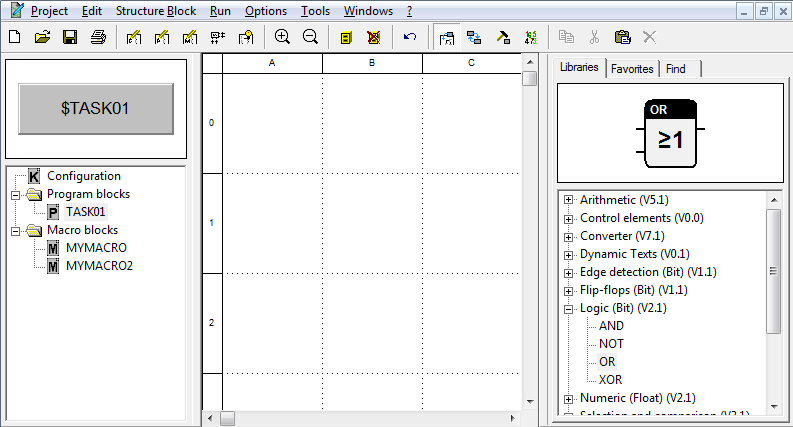
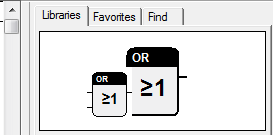
2. Grab the block symbol
Upon selection of the block, its symbol appears in the window above the list. The symbol can be grabbed by clicking it with the left mouse button. A window is generated under the cursor, displaying the symbol at the current zoom level.
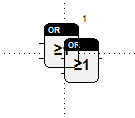
3. Position in the worksheet
The window with the symbol can be dragged by moving the cursor while holding the mouse button down. If the mouse button is released over a worksheet, the system inserts the block at the selected position. If its connectors touch free and compatible connectors of other blocks, connections are automatically established (Autoconnect).
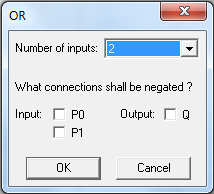
4. Enter parameters
If the block has an input dialog, it is opened for entering parameters.
3 Move blocks
Procedure
1. Grab the block in the worksheet
To move blocks within the worksheet, the system needs to be in the Working on the Drawing mode in the Edit state. A block can be grabbed by positioning the cursor on the block in the worksheet and pressing the left mouse button.
2. Drag and drop at the new position
By moving the cursor while holding the mouse button down, the block is moved. As soon as the button is released, it is dropped at the current position. Any connections with other blocks are preserved and newly drawn. If connectors without connection touch free and compatible connectors of other blocks, connections are automatically created (Autoconnect).
4 Delete blocks
Procedure
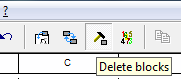
1. Change to the Delete Blocks mode
The cursor changes its form into a hammer.
2. Click the block in the worksheet using the left mouse button
Deleting of blocks also causes any connection with other blocks to be removed.
OR
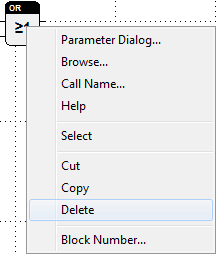
1. Call the context menu for a block in the worksheet
By clicking a block in the worksheet using the right mouse button, the related context menu can be called in the Working on the Drawing mode. There should not be any block selected.
2. Call the Delete command
By calling this command, the block and all linked connections are removed.
5 Replace blocks
Procedure
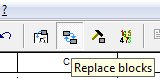
1. Change to the Replace Blocks mode
2. Select the new block in the project or library tree
Blocks defined in the project are inserted via the project tree, whereas all other blocks are inserted via the library tree.
3. Grabbing of the block symbol
After a block has been selected, its symbol appears in the window above the list. The symbol can be grabbed by clicking the symbol with the left mouse button. A window is created under the cursor, with the symbol displayed at the current zoom level.
4. Position at the place of the old block in the worksheet
By moving the cursor while holding the mouse button down, the window with the symbol is also moved. If the mouse button is released over the block, the system replaces this block by the newly selected one. Connections are preserved if connectors are compatible and labels correspond to those of the old block.
5. Enter parameters
If the block has an input dialog, this dialog is opened for entering parameters.
6 Block sequence
Procedure
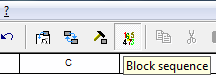
1. Change to the Block Sequence mode
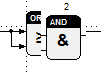
2. Click a block in the worksheet by pressing the right mouse button
Only blocks with a number in the upper right corner can be used.
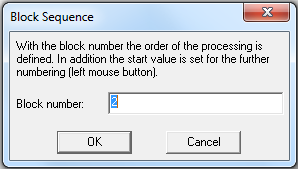
3. Enter the block number
The new block number can be entered in the Edit field of the opened dialog. Upon confirming the entry by pressing OK, the blocks in the worksheet are renumbered as desired. By pressing the left mouse button, the other blocks can be assigned consecutive numbers.
OR

1. Pressing the left mouse button on a block
By left clicking on the blocks in the worksheet a continuing number will be assigned.
OR
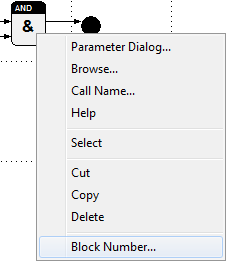
1. Call the context menu for a block in the worksheet
In the Working on the Drawing mode the relating context menu can be called by clicking a block in the worksheet with the right mouse button. There should be no block selected.
2. Call the Block Number command
This command is only activated for blocks with a number in their upper right corner.

3. Enter the block number
The new block number can be entered in the Edit field of the opened dialog. Upon confirming the entry by pressing OK, the blocks in the worksheet are renumbered accordingly. To number other blocks, follow the same sequence of operations.
7 Parameterize blocks
Parameterization is only possible for function blocks. Not all function blocks contain parameter dialogs. For unknown blocks, consult the block help first.
Procedure
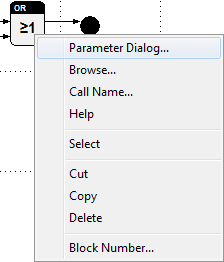
1. Call the context menu for a block in the worksheet
By clicking a block in the worksheet with the right mouse button in the Working on the Drawing mode, the relating context menu can be called.
2. Call the Parameter Dialog command
3. Enter the parameters
If the block has an input dialog, this dialog is opened for entering settings.
8 Connection attribute
If the video does not work, you can click here to watch.
Content
- Introduction
- Example assign application connektors (01:00)
→ Introduction: variables, attributes, application connectors, pin block, data point management, data types
By a right mouse click on a connector, the context menu can be used to assign a connection attribute. Outputs and inputs can have predefined global variables. In addition, inputs can have parameters and global parameters. Connection attributes becomes a part of the block shape. If the block is moved, all connection attributes will move in the same way. Blocks and connection attributes forms a unit.
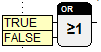
There are three types of connection attributes and they have different colors. Global variables have a light blue, parameters have a white and global parameters have a yellow color.
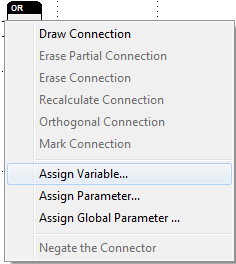
Assign variable
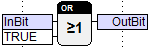
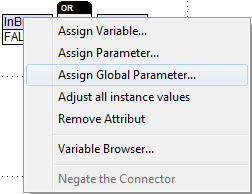
An existing global variable can be assigned to an input or output. For this the context menu entry “Assign Variable…” can be used. The following picture shows the assigning of a variable to an input. On outputs the entries for “Assign Parameter …” and “Assign Global Parameter …” are not active.
After choosing „Assign Variable…“ the dialog for the data pint administration will open for choosing one of the existing variables. Here new variables can be created, too.
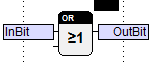
In this example we use the variable “InBit” for an input and “OutBit” for an output. In the left bottom corner there is the input field “Box width”, which sets the width of the connection attribute shape.

The data point administration features its own help. There it is described how to create and manage variables and data points. That help can be called by the F1 key when the dialog is open.
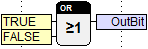
The following picture shows the block after assigning. A global variable is assigned to input and output.
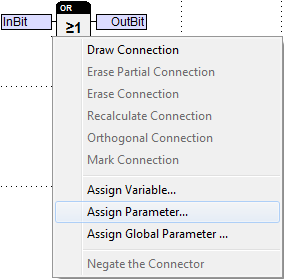
Assign (global) parameter
In addition to global variables, parameter and global parameter inputs can be assigned to inputs. This can be done by using the context entries “Assign Parameter …” and “Assign Global Parameter …”.
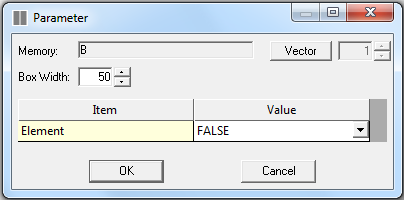
If no data type is defined for the input, a dialog will open to select it. After this the following dialog will open.
This dialog allows different entries dependent on data type. “Box Width” defines the width of the attribute shape. The button “Vector” allows creating vectors. In addition a value can be set otherwise the used default value is 0 or FALSE.

Difference between parameters and global parameters
For a global parameter only one instance exists in system. If the block with a global parameter is a part of a macro, then every instance of the copied macro blocks uses the same value of this parameter. If a nonglobal parameter is used, then every block of such a copy uses a separate instance of the parameter (same conditions like before). So every block can have its own parameter value. To assign all instance values to the class value use the context menu entry “Adjust all instance values”.
Executing this command will cause all connection attributes which are instances of this class attribute to take this value.
Replace connection attributes
To replace the assigned connection attribute of an input or output, the context menu can be used to assign another attribute.
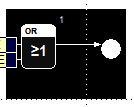
The input gets a new attribute, a global parameter. Doing this for both input connectors will result to the following picture.
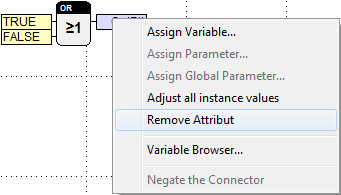
Delete connection attributes
The context menu entry Remove Attribute can be used to delete a connection attribute.
By using this command on the output that connector will be freed.
Extend or shorten connection attributes
Using the setting parameters, it was difficult to set the correct length for connection attributes with different length. Now you can set the required length with the mouse.
Procedure
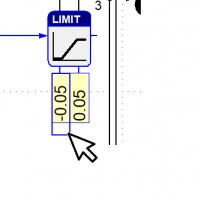
If the mouse is moved over the beginning and the end of a connection attribute it changes its appearance. Then you can change the length by pressing the left mouse button.
Notes
- If the attribute length is changed it will be set to the new value.
- You can still change also the attribute length via the parameter dialog.
- All available data types support the change of the attribute length.
9 Select blocks
Blocks must be selected to perform group operations. Selection is only possible in the Working on the Drawing mode. The sections below describe how individual and several blocks can be selected.
Procedure

1. Press Ctrl and the left mouse button over the block in the worksheet
Upon this command, the block is displayed with a dashed rectangular frame to mark it as selected. To deselect the block, use the same key-and-button combination again. Further blocks can be selected by using the same key-and-button combination. If the Shift key and the left mouse button are used over another block, all blocks within the rectangle formed by the red-framed reference block are selected.
OR
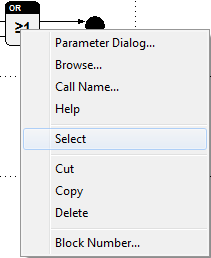
1. Call the context menu for a block in the worksheet
The relating context menu can be called by clicking a block in the worksheet with the right mouse button.
2. Call the Select command
OR
1. Click on a free area of the worksheet by pressing the left mouse button
2. Move the cursor holding the button down
A black rectangular is drawn. One corner is at the starting point, whereas the opposite corner is under the cursor.
3. Release the mouse button
This operation selects all blocks fully framed by the black rectangular.
OR

1. Call the Select All command in the Edit submenu
All blocks in the current worksheet are selected.
10 Block browser
The block browsers in test.con make it possible to retrieve sought-after block calls fast from the project. While in edit mode the calls are only searched within the structure blocks defined in the project, in run mode all block instances can be found which are located in structure blocks directly or indirectly inserted in the configuration (also from linked projects).
The work with the standard browsers integrated in the system is described below. Special function blocks can have their own browser functions. These are described in the belonging online helps.
Procedure
1. Call the context menu for a block in the worksheet or in the project or library tree
When editing in "Working on the drawing" mode or in run mode the belonging context menu can be opened by pressing the right mouse button over a block in a worksheet.
The context menu for a block in the project or library tree is called with the right mouse button over its name.


2. Call the Browse command
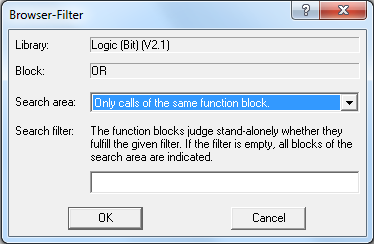
3. Enter search area and search filter
In the called dialog the search can be configured with the mentioned parameters. The search area defines whether all function or structure block calls or only calls of the same block are examined. At structure blocks the filter restricts the result to the calls in the search area whose name starts with the given text. When editing the structure block names and in Run mode the instance names are checked. The use of search filters at function blocks requires special knowledge about their function. A given filter is submitted to every function block of the search area and it decides whether the filter is fulfilled. Most function blocks don't evaluate the search filters and they return "not fulfilled".

4. Run the block browser
By pressing the OK button the dialog with the settings is closed and the browser starts. After that the search result is represented in a modeless dialog in form of a list. It contains the names of the blocks, the worksheets and the positions at which they were inserted.
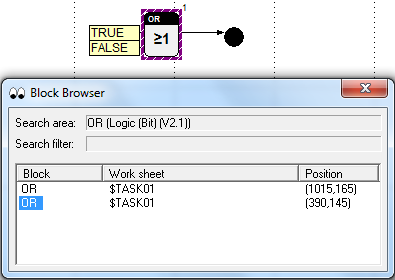
5. Jump to block calls
By double-clicking on a block name in the list the system jumps to the corresponding call. If not already available the given worksheet is opened and the scroll position is so changed that the block appears in the centre of the sheet if possible. In addition the block is highlighted with a violet, hatched frame. In the same way the other list entries also can be found.
The project can be edited without any problems with an open browser result list. It is only automatically closed at a new call of the block browser or when the system state is changed. However the list is static, i.e. it doesn't automatically adapt when blocks are deleted or inserted.